How to Draw Shrimp Drawing
Shrimp Drawing
Numerous staggering animals live in our seas and come in various shapes and sizes. The shrimp might be one of the more modest animals in the sea. However, it is one of the most surprising looking. Shrimp are likewise famous among fish food fans, given their extraordinary appearance. They are additionally well known for depicting fine art. Shimp Drawing & tulip Drawing or other drawing ideas for every drawing lover.
On the off chance that you might want to make a portion of this fine art yourself, figuring out how to draw a shrimp is fundamental. You will want to draw one of these curious animals toward this aide’s finish! We trust that you partake in this bit-by-bit guide on the most proficient method to attract a shrimp in only 6 stages!
Stage 1 – shrimp Drawing
For this initial step of our aid on the most proficient method to draw a shrimp. We will draw the head and body of the shrimp. To do this, we will define a few bent boundaries with a sharp end for the head. The head will likewise have a few more modest long shapes and a slight round shape for the eye. You can likewise involve a few bent lines for the sensors of the shrimp.
When you have this piece of shrimp looking as it does in our reference picture, you’re prepared for stage 2!
Stage 2 – Next, draw the legs of the shrimp
Shrimp have bunches of little legs at the foundation of their bodies that they use to live along the sea depths. We will draw this viewpoint for this step of your shrimp drawing. These legs will be drawn utilizing a few slightly bent shapes at the lower part of the body that you attracted in the past step.
It’s as simple as this step, and we are prepared to continue!
Stage 3 – Presently, draw the bent portions of the body
The back portion of a shrimp’s body comprises a few bent separate parts, which we will draw for this step of our aid on the most proficient method to draw a shrimp. To draw these portions, you will involve a few additional bent lines for the different fragments that interface. As you draw these sections, please make sure to point them with the goal that the body begins to bend in on itself.
We might be drawing four of these body sections for the present. Yet we will add a few additional ones in the subsequent stages!
Stage 4 – Next, draw the remainder of the shrimp’s tail
We will attract the remainder of the shrimp in this next part. This will be centered around the tail generally, and you can begin drawing it by adding three a more significant amount of those body portions twisting in. Then, at that point, whenever you have added those fragments. You can polish off this step by adding a few long and slight shapes to the furthest limit of the tail.
Whenever you have completed this tail and the remainder of the body. We will have a couple of conclusive subtleties to add before we begin shading it in for the last step.
Visit cute cool drawings tutorial on the cool drawing idea website.
Stage 5 – Presently, polish off your shrimp drawing
This step of our aid on the most proficient method to draw a shrimp will be tied in with adding the last contacts and parts before you continue toward the last step. To begin, we will add legs to the shrimp, which will go closer to its rear. You can involve a few square shapes for the foundation of the legs and utilize a few bent liens with sharp tips toward the end until the end of the legs. These legs will be much longer than the past legs that you drew! Whenever you have drawn these legs, you have completed each of the subtleties in this aide!
Before you continue, you can likewise add a few subtleties to put your twist on it. You could attract more shrimp to go with this one, or you could draw some more ocean life, like a few lobsters or fish! You could likewise attract a foundation to show where this shrimp is, and there are numerous choices for the kinds of foundations you could go for.
How about you polish off this image before the last part?
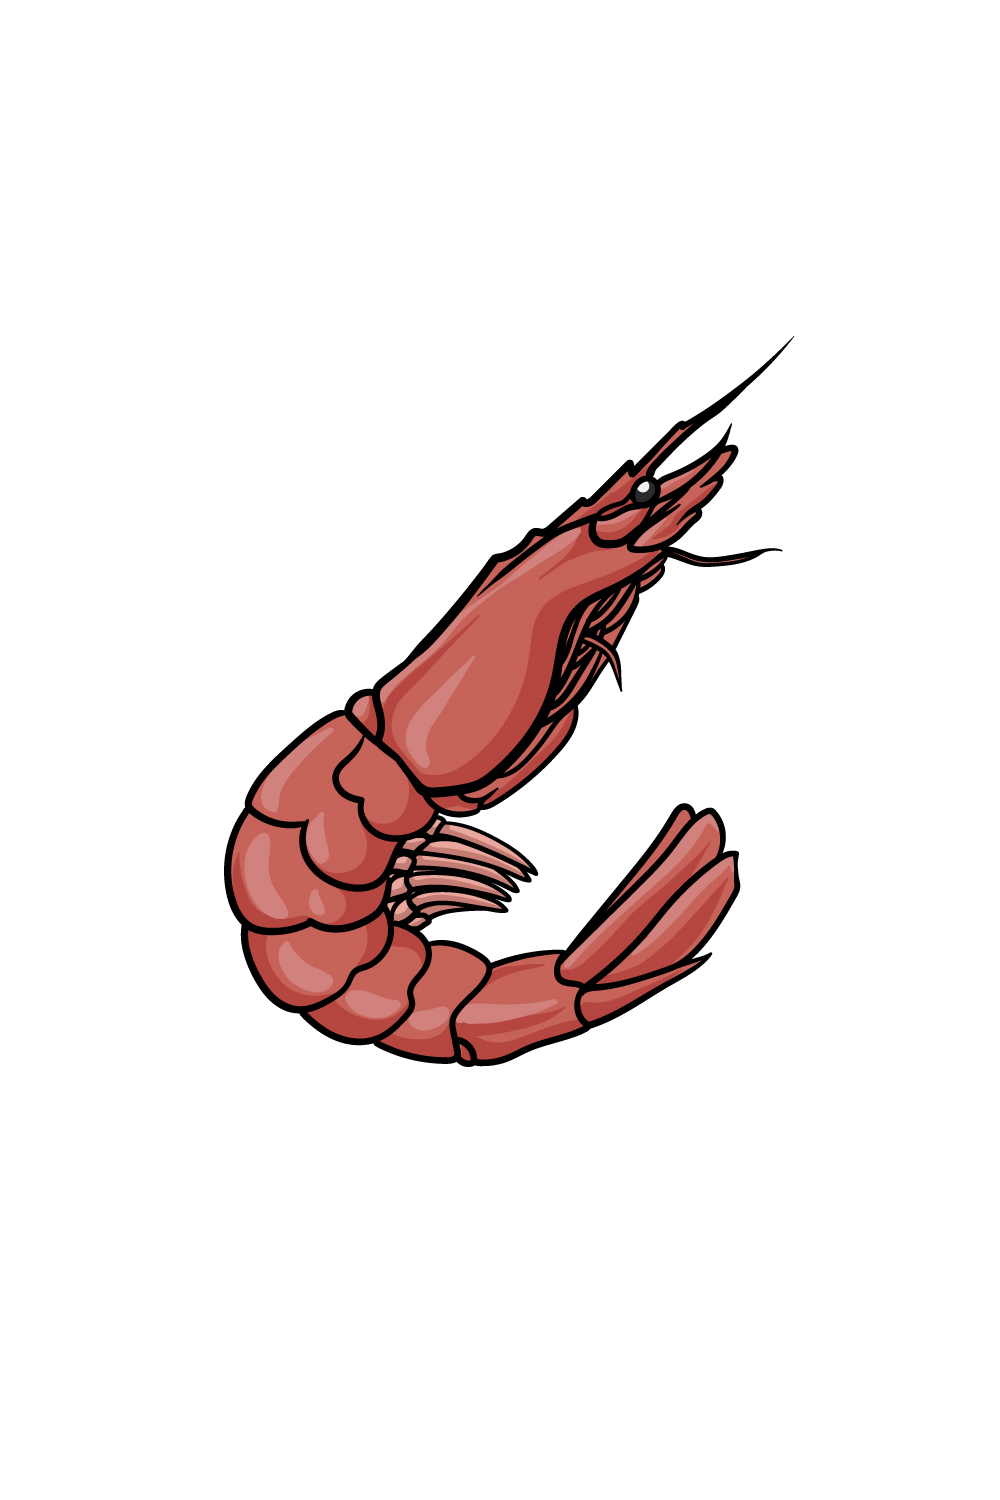
Stage 6 – Polish off your shrimp drawing with some tone
Since you have completed this shrimp drawing, you can polish it for certain astonishing tones. In our reference picture, we went for shades of red for the shrimp to give it decent, sensible varieties. You could go for a comparative variety conspire for your drawing, yet you could consolidate any tones you love. You might make a more expressive look by utilizing your number one brilliant varieties to rejuvenate it. When you understand what colors you want, you can pick which artistry mediums and apparatuses to rejuvenate the varieties.
You could involve acrylic paints or hued markers for a few more splendid varieties or watercolors and shaded pencils for different muffled tones to the varieties. Regardless of what you pick will look perfect, so let your innovativeness stream and communicate your thoughts with variety!