How to Convert Raw Images to Jpeg on Mac?

As a photographer, you’ll need to transform your RAW photo right into a Jpeg sooner or later, and on Mac, there are several smooth methods to do it. Here you go one of the simplest (and free) methods for changing those documents to your computer.
To convert a RAW image to JPEG on Mac, follow the steps:
- Right-click on your RAW record and select Open With > Preview.
- Inside the Preview window, go to File > Export.
- In the export talk container, set the “Format” to JPEG.
- Click Save to export your RAW file as a JPEG.
RAW files have a tendency to be quite large and aren’t usually a familiar document kind for importing online. Jpegs, on the other hand, compress your picture to an extra reasonable document length while maintaining a maximum of the photo first-rate.
With this easy approach to the usage of Preview, you may convert your files completely for free, without any additional packages.
With that stated, there are different approaches to streamlining this technique, especially if you need to batch-convert your files.
Read directly to learn a handful of helpful recommendations to make converting RAW to JPEG on Mac an easy and stress-unfastened system.
How To Convert RAW To JPEG On Mac
One of the perfect methods to transform RAW files to Jpeg on a Mac is to use Mac’s unfastened device, Preview, which allows you to view and control images. It is straightforward to overlook Preview and count on the device’s primary use just to open and observe your pics.
But there may be sincerely lotted extra use you could get out of Preview if you recognize where to appear.
Let’s discover the way to use Preview to transform an unmarried RAW file into a JPEG.
First, open Finder and locate the RAW picture you’d like to transform. Right-click on or Control + click on your photo document and click Open With > Preview.
You’ll note the file format.NEF – that is Nikon’s RAW report layout. Your RAW file layout might also vary, but the system stays equal.
With the Preview window open and your document selected, go to File > Export.
In the window that comes up, click on the drop-down subsequent to Format.
From the options within the listing, pick JPEG. You can also call your file, choose where to store it, and choose any compression options. Once you’re glad, click Save.
Your RAW photo might be converted to a JPEG, completely internal of Preview. This will make a replica reproduction of your unique document, so the RAW picture will now not be lost! Instead, you’ll be left with each a RAW and JPEG version of the identical photograph.
How To Convert RAW Into JPEG With Photo Editing Programs On Mac
There are the route, different ways you may convert RAW files into JPEGs, and the usage of editing applications you most probably have already got downloaded as a photographer. This is beneficial if you’d want to edit your pix before changing them.
Let’s explore a way to convert RAW snapshots into JPEGs with the use of the maximum not unusual, Lightroom and Photoshop.
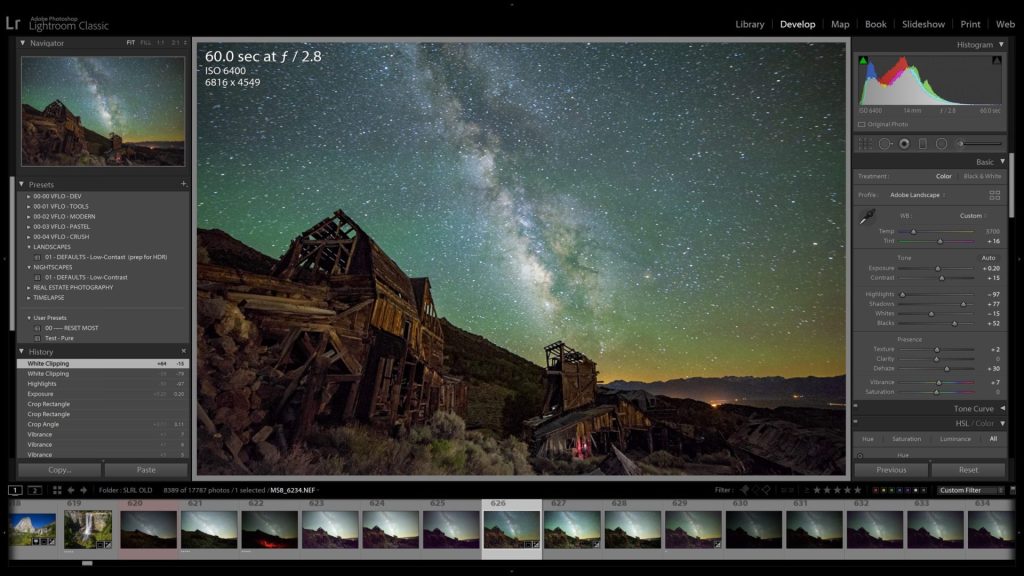
1. Lightroom
Many photographers use Lightroom to make fundamental edits to their photographs, along with raw images.
But you may also convert your RAW photographs into JPEGs (and a variety of different record codecs) thru the export process. To try this, first, open your image in Lightroom by means of going to File > Import Photos and Video.
Lightroom’s import window will seem, and here you may locate the pix you’d want to import. Make sure to check the box within the pinnacle left of the pix to choose them for import.
You can also Command + click to select a couple of, or Shift + click on the first and remaining in a chain to pick out consecutive pix. With all of your photos selected, click Import.
At this point, you could edit any photographs you’d like in the Develop tab. Once you are finished modifying (or now not if you just need to transform), it’s time to export your pix.
Select all pictures you’d like to transform/export. You can do this either inside the Filmstrip or within the Library.
With the photos decided on which you’d like to export, head to File > Export.
In the window that comes up, you may edit diverse export settings for your pics, including the name, the export area, or the size and first-class settings. I spotlight the first-rate export settings for Lightroom here.
To store the photograph as a JPEG, head to the File Settings tab. Next to Image Format, JPEG may already be decided on. If it’s not, click the drop-down and select it from the list.
Then, click on Export Here you go. Your RAW pictures will export the vacation spot you selected, now as JPEG files.
2. Photoshop
Like Lightroom, Photoshop lets you edit your pics however has plenty of extra in-depth abilities than simple photograph enhancing.
The technique for converting a RAW photograph to a JPEG in Photoshop is pretty much like the procedure for Lightroom. First, you want to import your image. Head to File > Open and select the record you’d want to import.
Because you’re commencing a RAW record, the Camera Raw window will routinely open. You can make any primary edits you’d like on your picture right Here you go.
Once you’re completed, click Open to open your image in Photoshop. You can make any similar edits you’d like, however now it’s time to export your image as a JPEG.
- To do this, head to File > Export > Export As.
- In the window that appears, head to the File Settings phase and click on the drop-down menu subsequent to Format. Select JPG.
- You can also adjust other settings here, inclusive of record area and image first-class – I recommend placing the pleasant to Excellent or Great to keep the most pleasant possible image.