How to Draw A Fairy
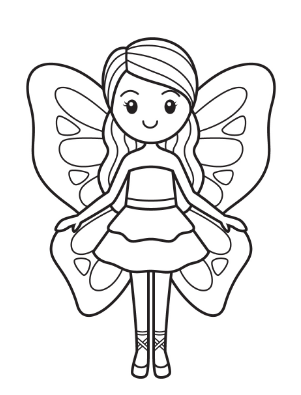
How to Draw a Fairy. Fairies are magical creatures from European mythology, although their origin is unclear. Some popular traditions hold that fairies were evil spirits; others were unworthy angels. Some stories portray fairies as a different race of creatures that inhabited wooded areas. Modern popular culture includes various fairies, the most famous Tinker Bell.
He first appeared in Disney’s Peter Pan (1953) and has since starred in several movies and television series. Would you like to draw your fairy? Doing so is easy with this easy step-by-step tutorial. All you’ll need is a sheet of paper and a pencil, and maybe an eraser and something to color with.
Also check our house drawing ideas.
Step-by-step instructions for drawing a fairy.
Step 1
Begin by drawing a rotation to outline the figure of the head.
Step 2
Draw a curved stripe through the circle to sketch the profile of the chin and ear of the fairy.
Step 3
Erase the guidelines left by the original circle.
Step 4
Extend one long and one short line from the head to form the neck and arm. Draw a short line parallel to the long line to form the lower part of the arm.
Step 5
Open two curved lines from the opposing side of the neck to create the other arm of the fairy.
Step 6
Draw two parallel curved lines in the continuation of each arm. Notice how the lines curve inward at the elbow and wrist of the fairy.
Step 7
Draw a hand at the back of each affluent. Use narrow overlapping lines in a “U” shape to form the fingers and detail the palm with short lines.
Step 8
Draw a “U” shaped line around the neck to form the clothing collar. Extend a curved line down from each shoulder to outline the torso.
Step 9
Draw two parallel curved lines on the lower torso, forming a belt. Extend a curved line from each side of the belt. Then connect these lines using a long wavy line, making a skirt for the fairy.
Step 10
Detail the dress. Draw wavy, scalloped lines along the neckline and sleeves of the dress. Draw a wavy line at the bottom of the dress, then short, curvy lines extending up from this line and down from the belt. This adds surface to the folds of the textile.
Step 11
Draw the legs. Unfold an “L” shaped line from the kilt, forming a leg flexed at the knee. Draw a line parallel to each section of the “L” to outline the other side of the leg. Then extend two slightly curved parallel lines down from the knee of the bent leg. This outlines the far leg.
Step 12
Give the fairy some shoes. Enclose the bottom of each leg using a curved line. Draw a flower shape on the toe of each shoe by connecting small lines in a “U” shape. Draw a curved line from the bloom to the ankle to form the shelter of the shoe.
Step 13
Draw ribbons on each wrist. Draw three curved stripes across the arm, then extend two groups of curved lines from each. Relate each set of lines using two straight lines. Then use directly parallel lines to draw a baton in one hand. Enclose the wand at the bottom by drawing a small circle.
Step 14
Draw the hair. Use a lengthy, curved line to sketch the hair from the top of the charge to the shoulder. Around the face and at the end of the follicle, enclose the shape using several curved lines of various sizes. Let the lines meet at the points. Draw curved lines through the hair to add detail.
Step 15
Draw a star at the top of the wand, surrounded by dots of pixie dust.
Step 16
Decorate the dress with stars and circles.
Step 17
Draw a circle for each eye. Inside the eye, draw a small oval and a curved line at the bottom; shadow between the oval and the line. Draw curved stripes above each eye, starting with the eyelid and eyebrow.
Step 18
Draw a broad line in a “U” shape to form the smiling mouth. Draw curved lines below the mouth to form a dimple for the chin, and use another curved line to form the nose.
Step 19
Draw the wings by extending long, curved lines from the head and lower back, allowing them to meet at a point.
Author bio:
Hello, I am a professional SEO Expert & Write for us technology blog and submit a guest posts on different platforms- we provides a good opportunity for content writers to submit guest posts on our website. We frequently highlight and tend to showcase guests.
Drawing Completed
Also read: 3 Unique Methods for How to Draw a Honey bee Bit by bit